Spoilers in links. So be careful how you click.
It’s been nearly a month since Captain America: The Winter Soldier premiered in theatres. That doesn’t mean, however, that my feelings for the film have waned. In fact, if anything, I find myself thinking about it more every day, as the increasing ratio of Cap/not Cap posts on my Tumblr will reveal.
This obsession intense interest inspired me to design a Winter Soldier manicure, and in the process to try out some new techniques. Disclaimer: I have a LOT of nailpolish just laying around so please don’t feel sad in your heart if you don’t have the colors or tools required to replicate this design.
Step One: Gathering Inspiration
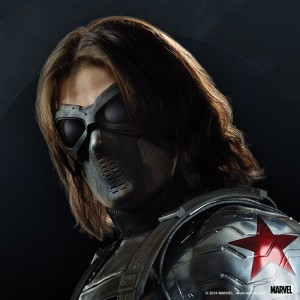
I needed to pick out colors for the design, so I did a simple google search/had already been staring at the Winter Soldier on tumblr all day. For the Winter Soldier, the colors are pretty simple: Black, silver, and red. If you want to get technical or mix things up a little, you can use blue as well, but we’ll get to that later.
This is how I start any nail polish/fashion design based on a character or movie I love. Not only will it give you a chance to revisit something you love, but gathering source material for all your options is great in case plan A doesn’t work out. Based on the colors I have (which is…all the colors) I decided on a black, silver and red blend. I used colors with sparkle in them to replicate the Soldier’s metallic arm, which is one of the most important parts about him. 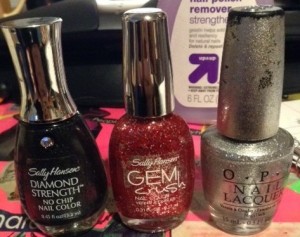
Step Two: Base Coat
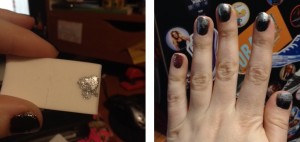
I decided, since black is the most prominent color in the Soldier’s costume, to use black as my base coat. I am not one for solid black nails, though, so I used a color I actually bought for a Star Trek manicure. Sally Hansen Black Diamond is a dark shade, but it has tiny flecks of silver polish to lighten it up just a tad. One coat will give you a charcoal color, two will provide the solid black you see on my nails.
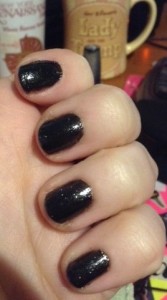
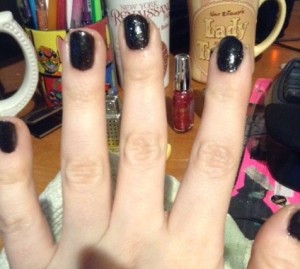 I wanted to make sure that the silver and red would look good together, so I tested them out on a piece of paper. You can see in the picture that I wasn’t careful about making it look pretty, this was very much a test swatch. Feel free to make your swatch bigger and test out more colors if you need to.
 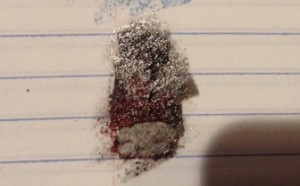 Making swatches also allows for your base coat to dry out before applying more colors.
Step Three: Top Coats
I liked the silver on the black so I spread a generous amount of it on a makeup sponge and dabbed it on each of my fingers. The silver I’m using here is O.P.I. Designer Series in Radiance. It’s a really opaque silver that’s pretty versatile–I recommend it if you make a habit of trying out new nail polish designs.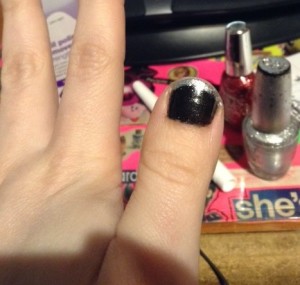 I started each nail with a very thin line of silver, almost like a french manicure, and then dabbed the silver down the nail until I liked the amount that was covered. I went a little overboard on the pinky, but for the rest of my hand I was more careful and only covered about 1/3 of the nail with silver. Since silver and black don’t really “blend” I just wanted to make the line between them as inconspicuous as possible. You can do this by dabbing the color on top until the line is fuzzy and uneven. It’s okay if the nails look kind of messy at this point, you will still get to clean them up a bit with the second color.
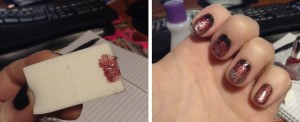
I repeated the process with the red color which is Sally Hansen Gem Crush in Cha-Ching. This time, however, I started as low down as I wanted to black to be covered, and dabbed up to the top of the nail. 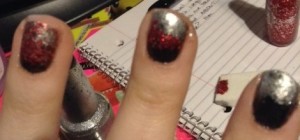 Again, you can see precision is not the goal here. The colors will blend with the sponge, just make sure you have enough polish on there so that you can cover the whole width of the nail.
I decided to leave the right hand plain black, considering the Soldier only has one metal arm, but you can paint both hands if you’d like to. Top it all off with some clear polish, and you’re done! Except for–
Step Four: Cleaning It Up and Letting it Dry
You are GOING to get nail polish on your fingers. That is GOING to happen. Don’t panic, just come prepared. I keep a whole bottle of remover handy while painting my nails, along with the Sally Hansen No More Mistakes stick and some qtips and paper towels (for the big boo-boos when I have to start all over). I wind up investing just as much time removing paint from my skin as I do applying it to my nails, but I’d rather have my whole nail covered than miss the sides. That’s just my preference.
Also, I CANNOT STRESS THIS ENOUGH: That was a lot of nail polish, bucko. Unless it took you two hours to do this and you let each layer dry completely before adding another (and even in that case…), your nails are going to be susceptible to scratches and smudges for another couple hours at LEAST. Refrain from scratching anything and maybe don’t go rock climbing immediately. I’m serious. I messed the manicure up twice just while typing this.
BONUS ROUND
Out of curiosity, I decided to test out another color combination on my other hand (I know I said I left it black. And I would have…if it weren’t in the name of science and stuff). Considering who the Winter Soldier turns out to be, I went with the same black base coat and Red top, but used a dash of Sally Hansen Insta-Dry Co-Bolt Blue in the middle. Personally, I like the final product with the silver slightly better, but the blue is an interesting color too. I used the same process on this hand, so you can look through the gallery to see the final product:
Obviously you can use any type of nail polish to create a similar effect, these are the colors I happen to have in my (admittedly sizable) polish collection. Have you ever created a nail design based on a character or a book or movie? Let us know in the comments, and show us pictures! If you want to see more designs, shoot me an email and I will try something new!


